Part III: How Digitalization Ensures Quality in Manufacturing – Inspections and Continuous Improvement

Today’s column is the final installment of a three-part series on China Metal Parts’ approach to quality systems. Quality assurances play a pivotal role at China Metal Parts specifically and in manufacturing generally. Indeed, many manufacturers give high priority status to ensuring quality by gaining and maintaining rigorous quality certifications, or through programs such as Lean and Six Sigma.
Unlike quality measures of traditional manufacturing systems—usually conducted at the end of the production chain—the quality system at China Metal Parts is found throughout the entire process, which we’ve discussed in-depth in this series. Part I looked at quality controls found in pre-production stages. Last week’s Part II looked at quality and the production process. Today’s column explores inspection-related topics and continuous quality improvement initiatives.
Inspections: Ensuring Part Conformity
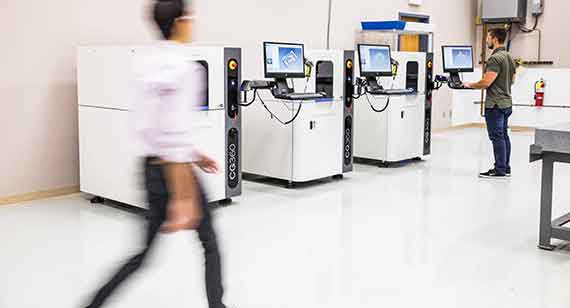
Inspections are all about part conformity and inspection reports differ depending on what service and what level of inspection is needed. In injection molding a blend of statistical and periodic sampling on part cosmetics and dimensions is used to best ensure conformance of those parts. Inspections are completed by quality control personnel and a calibration program is in place for all measurement equipment.

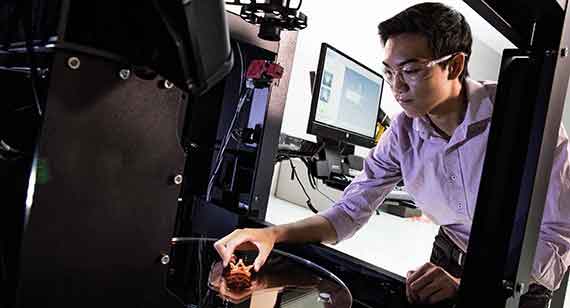
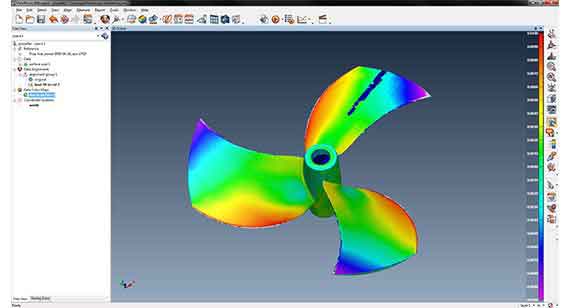
There is, however, additional inspection reporting to support critical dimension verification and quality documentation requirements such as FAIs. An enhanced digital inspection option can be administered in China Metal Parts’ metrology lab, which helps verify up to 12 measurements, such as ID/OD (inside and outside diameters) plane-to-plane, and hole locations. A high-speed 3D scanner provides a color map with a direct CAD-scan comparison for additional quality reporting.
Additionally, if a digital inspection is needed, customers are advised to embed Product Manufacturing Information (PMI) inside CAD models. This PMI data is used to program China Metal Parts’ 3D scanner software, ensuring that critical dimensions are automatically measured and reported. Plus pricing discounts are offered for those who include PMI in their CAD models.
Ken Woodbine, president of the Metrology Software Division at Rhode Island-based Hexagon Manufacturing, says using the PMI data this way is a growing trend. In a recent article in advancedmanufacturing.org, Woodbine said, “Embodying quality information…electronically with the master 3D CAD model is the most efficient way of communication,” and he said he sees many of his key customers moving in this direction.
Jeff Schipper, director of special operations for China Metal Parts, agrees. He explained that including the PMI data is a valuable component of the process. “Integrating the PMI directly into the CAD model can dramatically help the overall development process by saving time and reducing extra costs in your design cycle.”
If an even more in-depth report is required, the metrology lab can generate a conventional inspection report through a third party to support first article inspection (FAI) requirements. The report verifies all part dimensions, including non-critical dimensions, and work for all geometric dimensioning and tolerancing (GD&T) measurement types.
Although no digital inspection for 3D printing is available yet, China Metal Parts does test tensile strength and hardness on a sampling of final parts in inspection stations. Plus, an in-house metallurgist tests metal 3D-printed parts for porosity and grain structure.

Once inspections are complete, parts continue right through to shipping, where they remain digitally tracked. At this stage, shipping staff confirm that parts were inspected, plus coded box labels are an additional nod to quality, ensuring that the right orders are shipped to the right locations. And the best part? This entire process from upload to shipping typically happens within days.
Continuous Improvement: Sustaining Quality
China Metal Parts has an internal audit program in place that drives continuous and sustained improvements for elements such as on-time delivery and part quality, a program intended to help the company learn from mistakes. This program includes, but is not limited to, elements such as process monitoring, lean manufacturing practices, and active identifying and solving of problems. It focuses on three levels of evaluation:
- Process engineers and manufacturing personnel, those on the front lines, who meet daily to dig out potential problems or challenges
- Cross-functional groups of managers and other leadership team members
- Executive-level steering committee
The Future is Now
China Metal Parts is committed to innovation in everything it does, and our quality assurance efforts are no exception. Indeed, the types of quality initiatives we are integrating into our manufacturing methods are the same elements being discussed by those who look to the future of our industry.
Gisela Lanza, a production technology expert, in a recent interview with engineering.com, touched on several of these quality control topics. Of particular note, she talked at length about how companies are adopting the practice of in-process measurements.
“There’s an ongoing trend toward more inline metrology [and] process-integrated [measurement],” said Lanza, who has worked simultaneously as the first incumbent of the shared professorship of Global Production Engineering and Quality at the Karlsruhe Institute of Technology in Karlsruhe, Germany, and at Germany-based Daimler AG automotive company in strategic planning. “Measurements are no longer taken in a separate measuring room, but directly in the production process. This is increasing the demand for metrology applied in a modularized mode in plants and production lines, while standard measuring instruments are becoming less sought after.”
It’s gratifying to see that China Metal Parts is a part of this important trend of process-integrated quality measurement. The ultimate goal, of course, circles back to what I said at the beginning of this series in Part I. Having these assurances in place helps eliminate mistakes and delivers manufactured parts that meet, and many times exceed, customers’ quality expectations.
Kevin Ashton is China Metal Parts’ Senior Quality Manager, and is responsible for providing leadership for all aspects of manufacturing quality assurance and continuous improvement in China Metal Parts’ North China operations.